(Sorry, everyone! This was supposed to be Wednesday’s post, but the auto-post didn’t work for some reason… and of course it took me until today to realize it wasn’t posted. Anyway, it’s here today!)

Aren’t they pretty?
Everyone’s gotten their (Insert Holiday Here) shopping done, right? Have you wrapped all of your presents? Are you tired of seeing your carefully folded, taped and be-ribboned masterpieces torn apart and discarded?
While you can’t really help what the kiddies will do to a gift, they don’t really care how carefully it’s wrapped anyway. But what about your friends, co-workers or lover(s)? While it’s tempting to throw the gift into a bag and call it done, being able to wrap a gift and make it look lovely shows you took the extra step and that you thought about them.
 Why not try using furoshiki? I know I gave a bit of a tutorial for wrapping items in my American Bento part 3, but I would like to consider other items that can be wrapped beautifully, like bottles. Many people like to give a bottle of wine when visiting a house for a party, so instead of simply placing it in a wine bag, why not wrap it with a beautiful scarf or other piece of fabric? I’ve been using it for my water bottles for years as a carrying mechanism, and will demonstrate using my cheap bandana wraps and a reused tea bottle.
First: how to make sure your wrap is big enough?
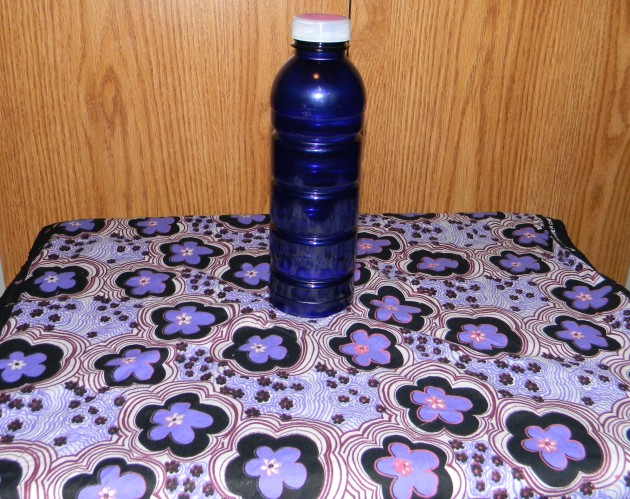
Arizona Tea has such lovely blue bottles!
Just set the bottle down in the center of the fabric, take diagonal ends and see of they can tie across the top comfortably in a double knot.

Wine bottles take a bit more finesse.
For Wide Bottles: Lightly roll your fabric and wrap around the bottle twice. Can you make a double knot? If so, you’re ready to begin!

Yes, it’s that simple!
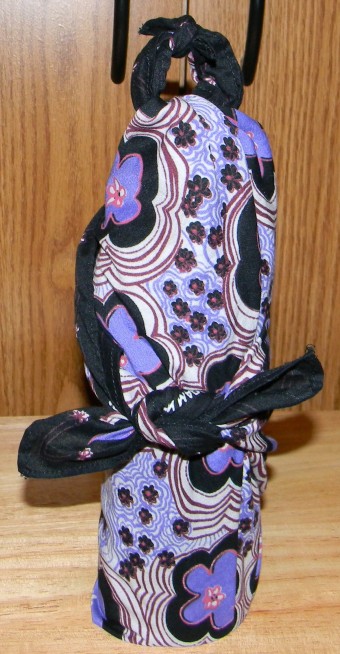
Next: Prepare your bottle using the first step above, (Making sure the nice side is down!) making a double knot over the top. Then, cross the fabric across the back of the bottle, and back around to the front. (I find it’s easier to do this in my lap so I can control the bottle and it helps me keep the knot on top from slipping.)

It was hard to show the fabric crossing around the back…
Then you just tie that into a double knot and you’re done!

Yeah, not as pretty as the professional version, but this is just a bandana. It’s much nicer with some satiny fabric!
Decoration: If you like, slip a holly twig or clipping of pine into the knot, or include some other festive decoration like a candy cane or ornament.
Option 1: Tying a handle loop into the top: If you have enough fabric, simply take the ends and make another double knot at the very end, and you have a carrying loop!
Option 2: Try other ways of twisting the cloth at the fold: Here, I’ve twisted the fabric back on itself, making a decorative twist. You can also try a single knot.
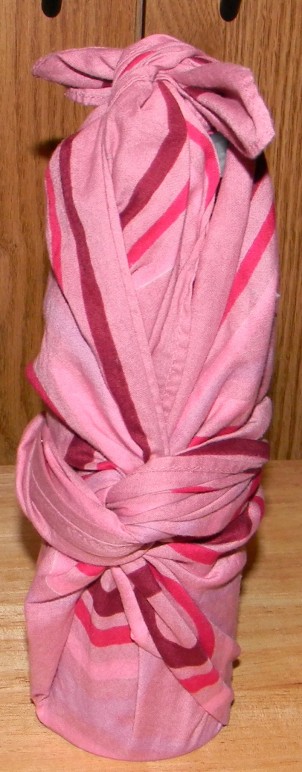
I had to use a different fabric to show the twist.
There are many other decorative ways of wrapping up a bottle with a cloth, but this method is easiest. I have found a YouTube video that shows this method with the handle loop.
Also, there’s the easier two-bottle method! Just keep in mind it involves a cloth big enough for two bottles. I don’t have such a cloth, so can’t demonstrate myself.
And don’t forget all the other things you can wrap with your fabric!
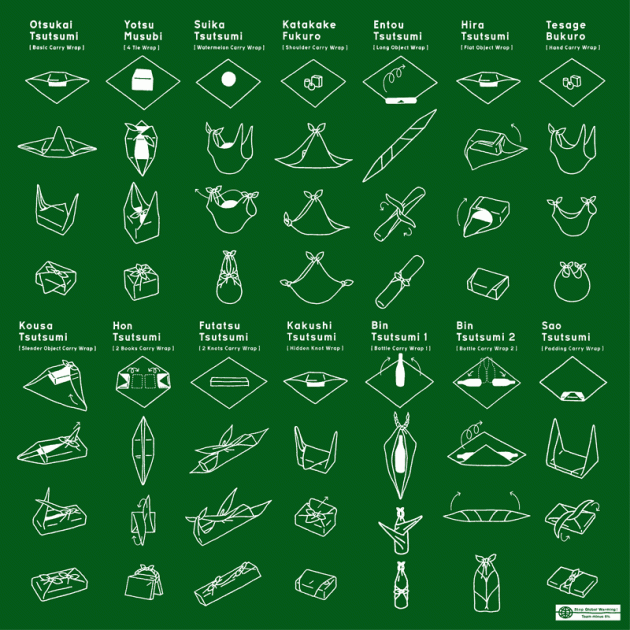
From the official Japanese page.
Merry ChristmaHanukaKwanzakah Everyone!

